I can allocate Loads from the loads page towards a Sale/Warehouse
In this article, you'll learn how to allocate loads or containers from the Loads page towards a sale, a purchase, or a warehouse.
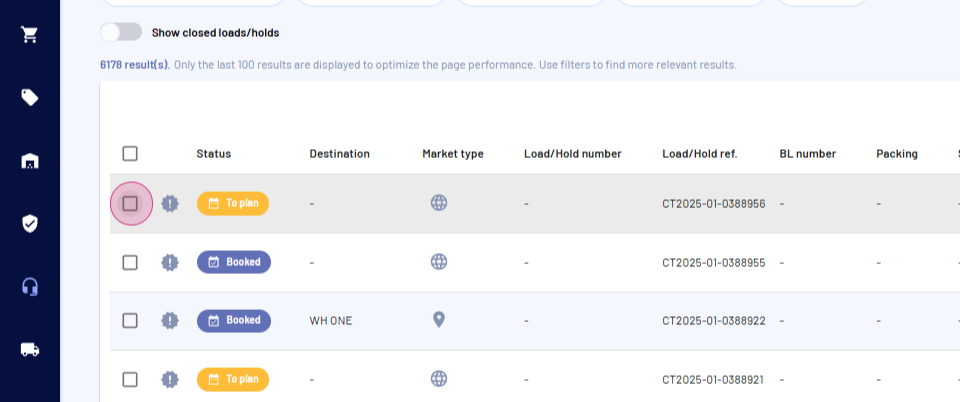
Step 1: Navigate to the Loads page under the Logistics module. Select a load.
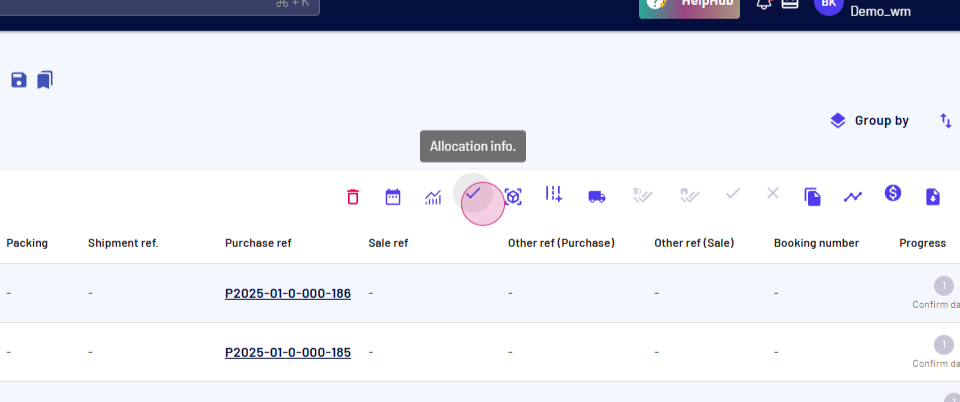
Step 2: Click on Allocation.
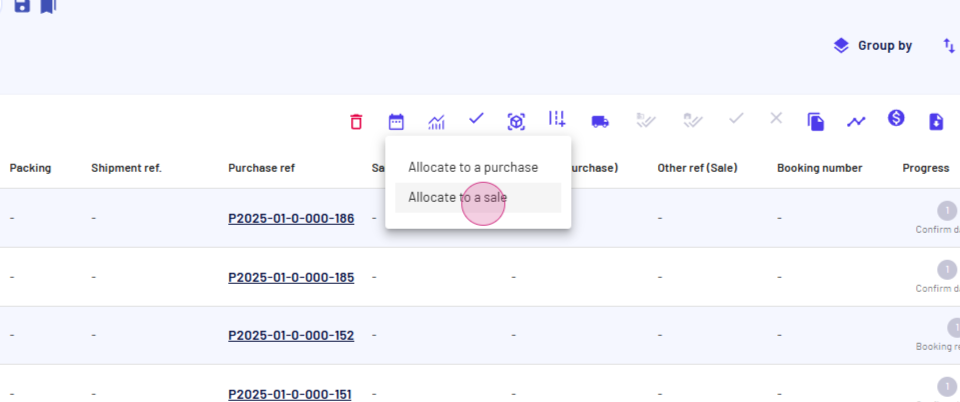
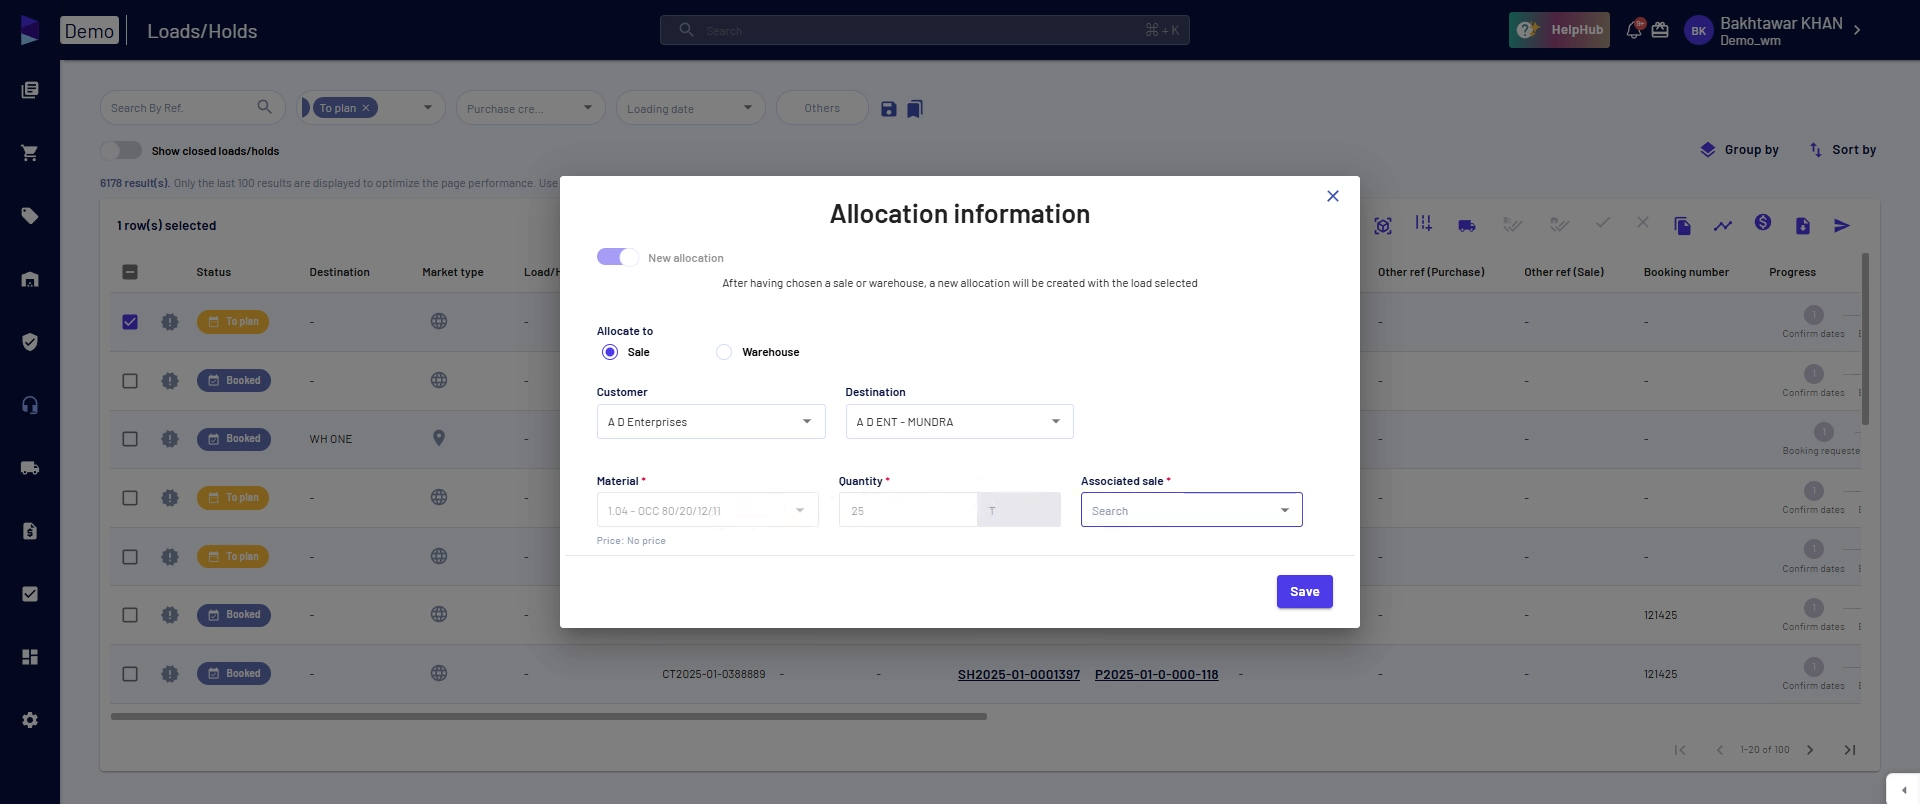
Step 3: You'll see options to allocate the load to a purchase or a sale. For this example, select Sale.
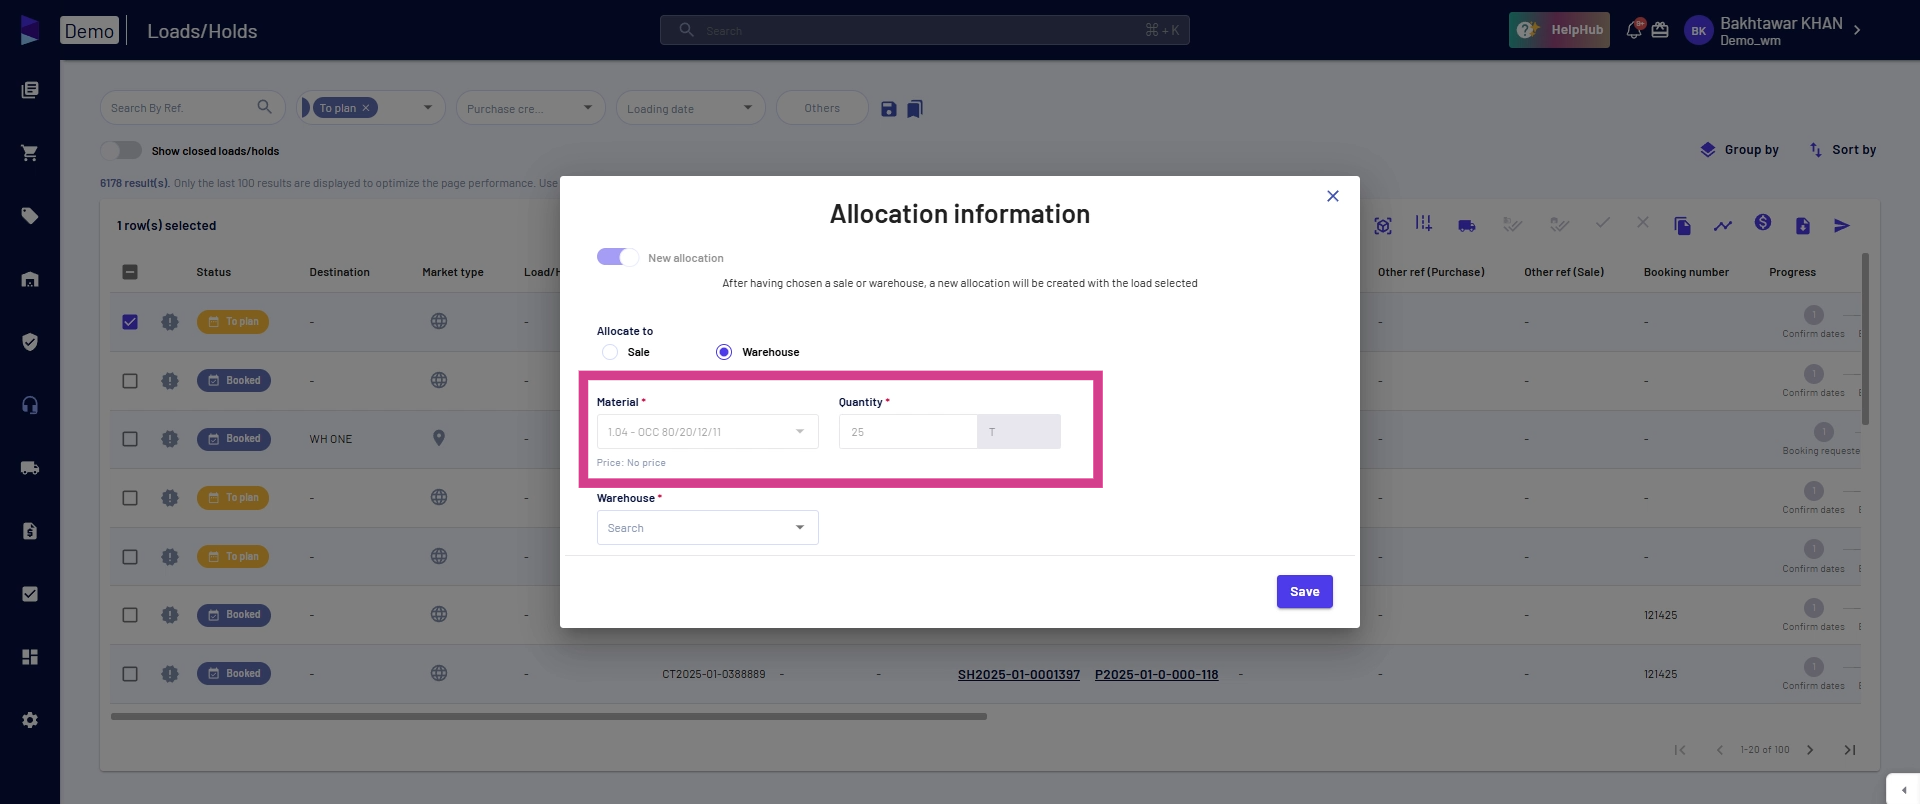
Step 4: Now, you'll have the option to allocate between a sale and a warehouse.
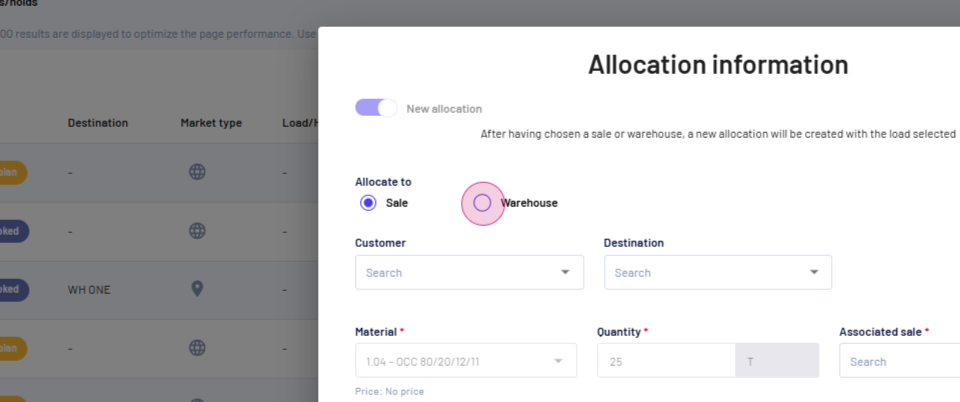
Step 5: Click on Warehouse. The material and quantity are pre-selected based on the load you've chosen.
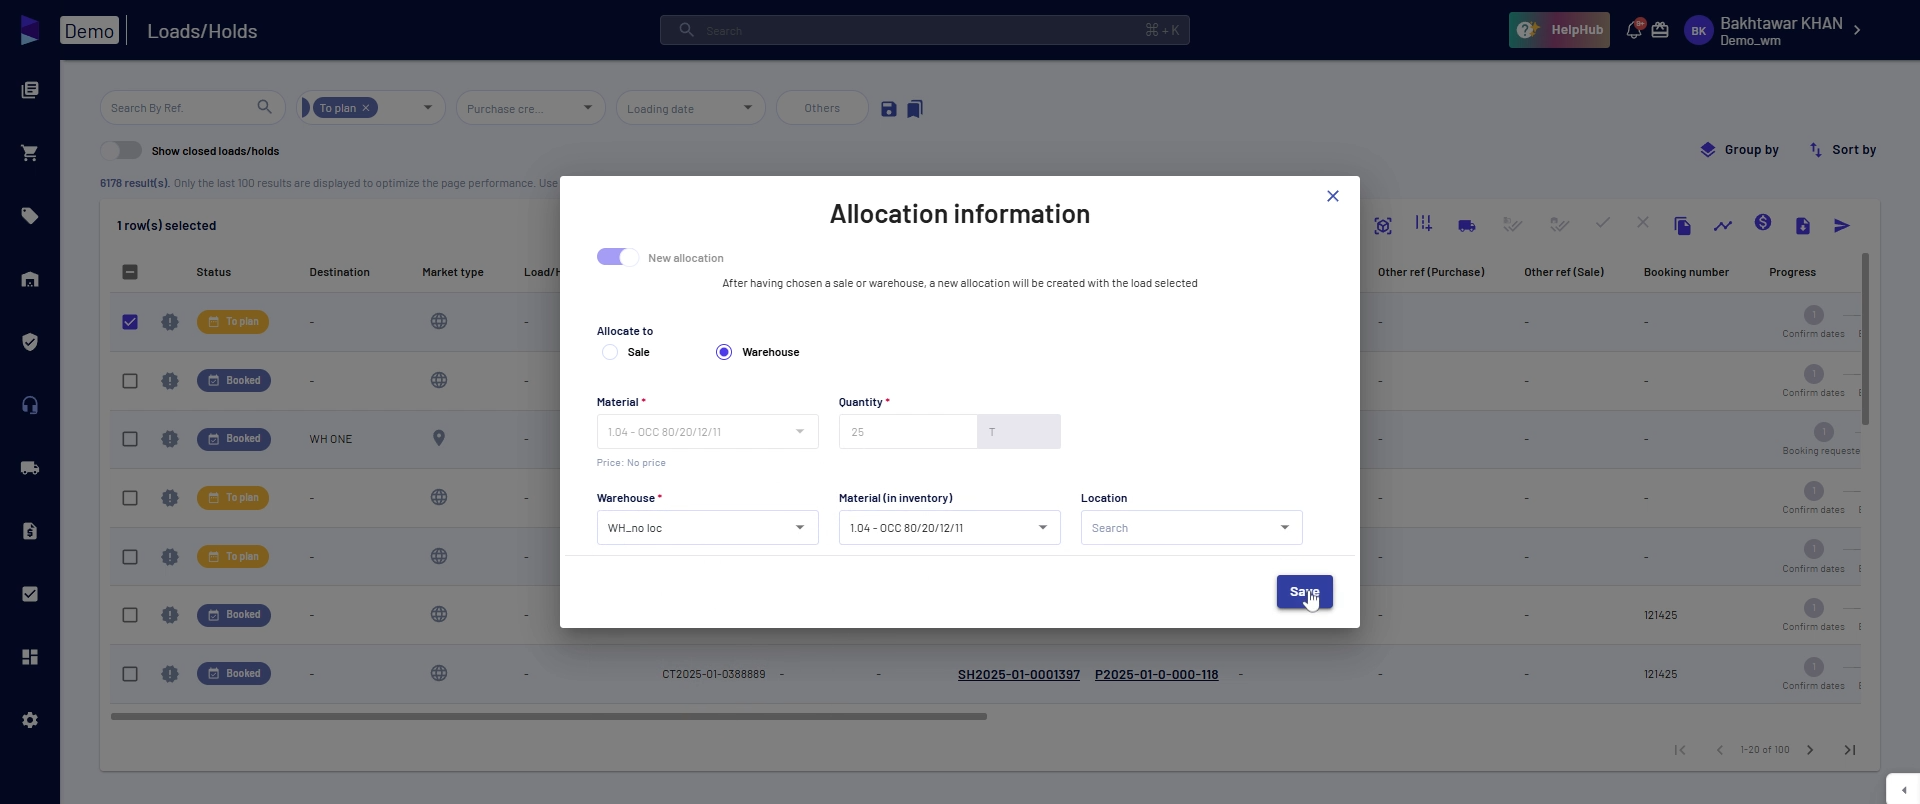
Step 6: Select your warehouse.

Step 7: If necessary, specify the location. Click on Save.
Step 8: Now, click on Sale.
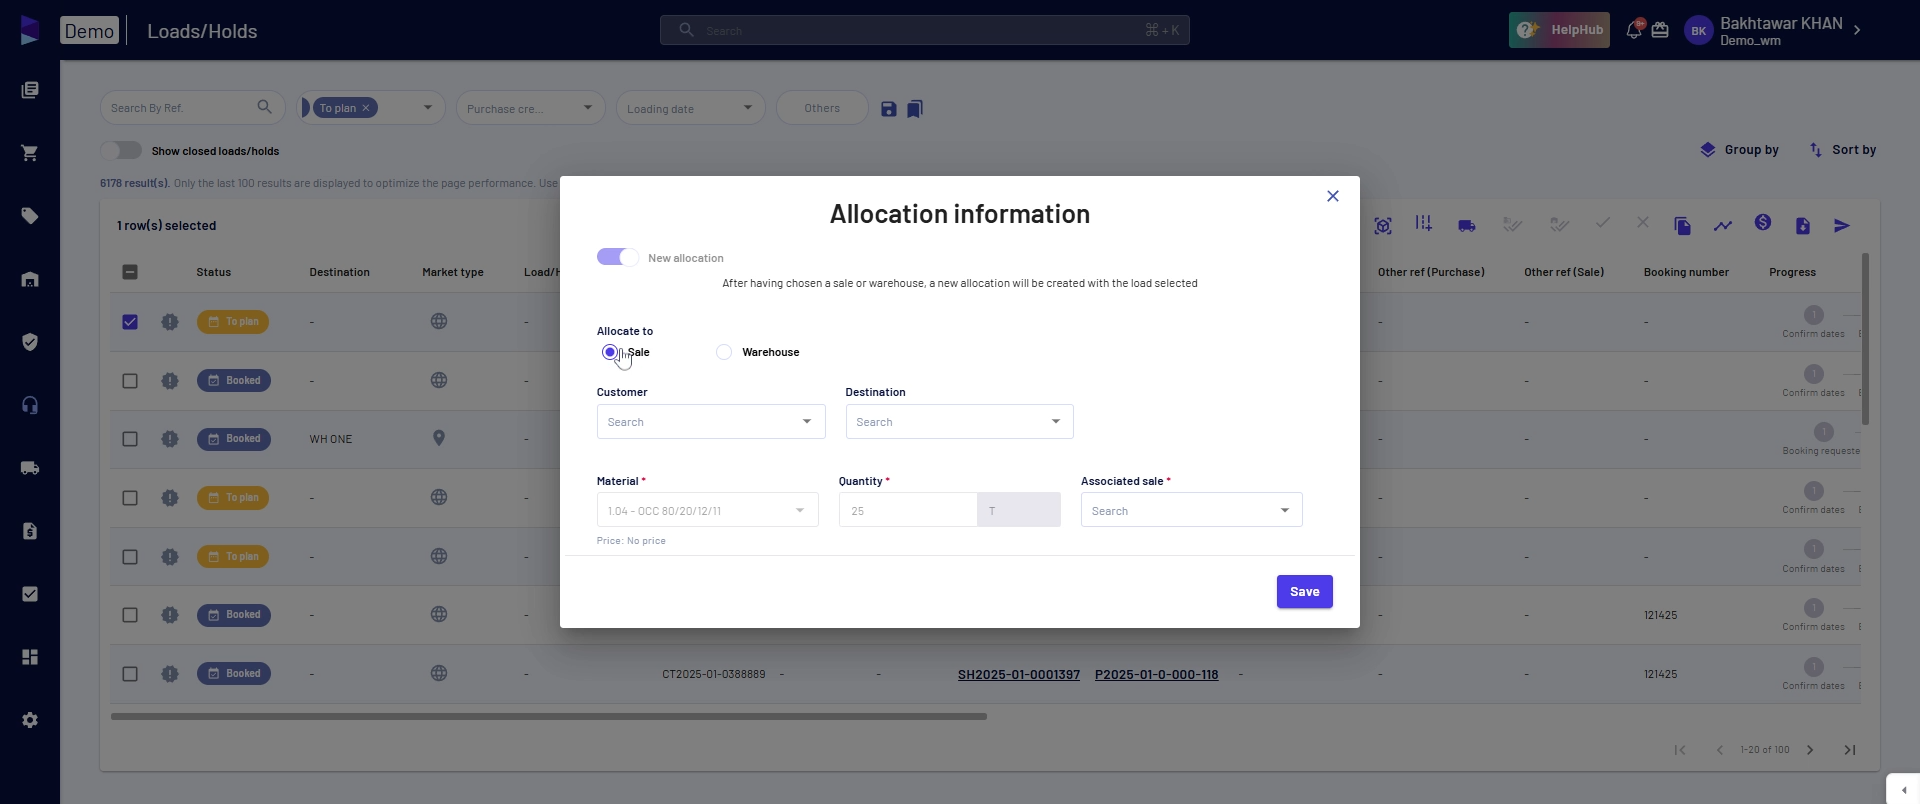
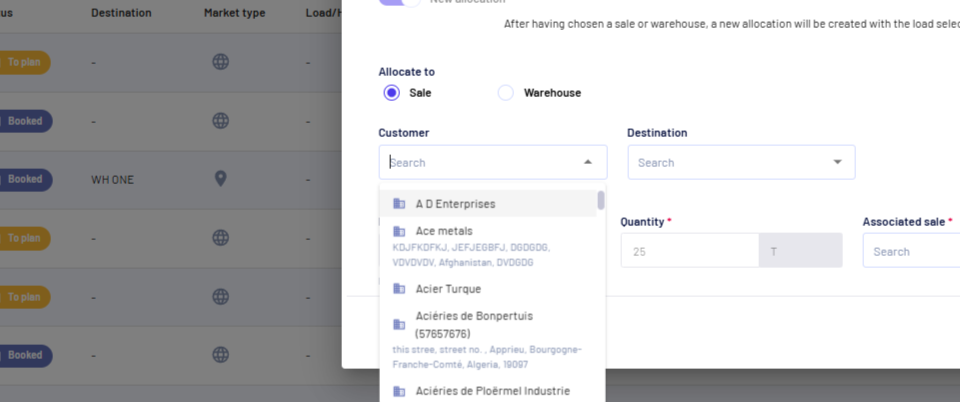
Step 9: Select a customer.
Step 10: Choose the destination.
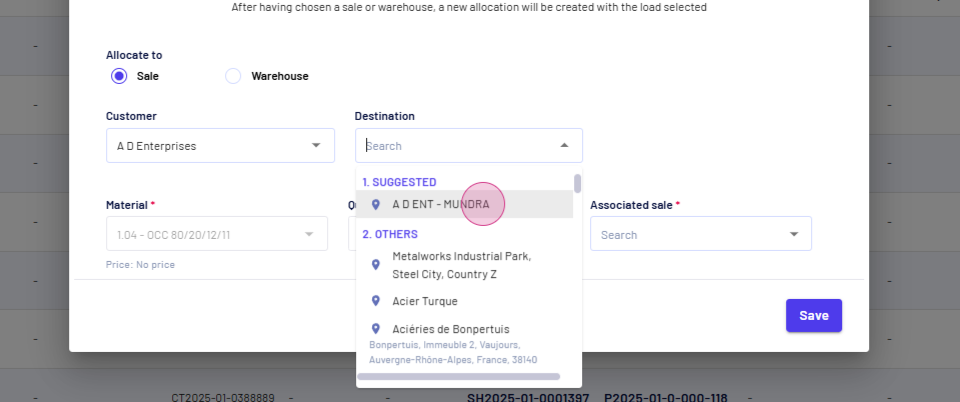
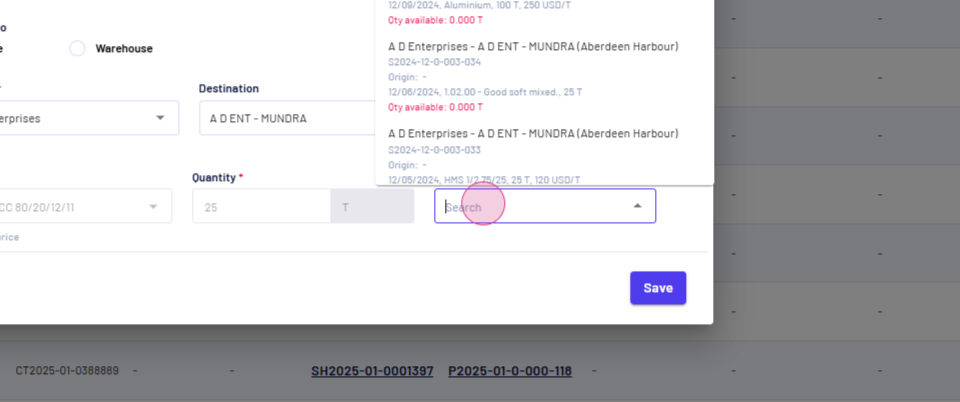
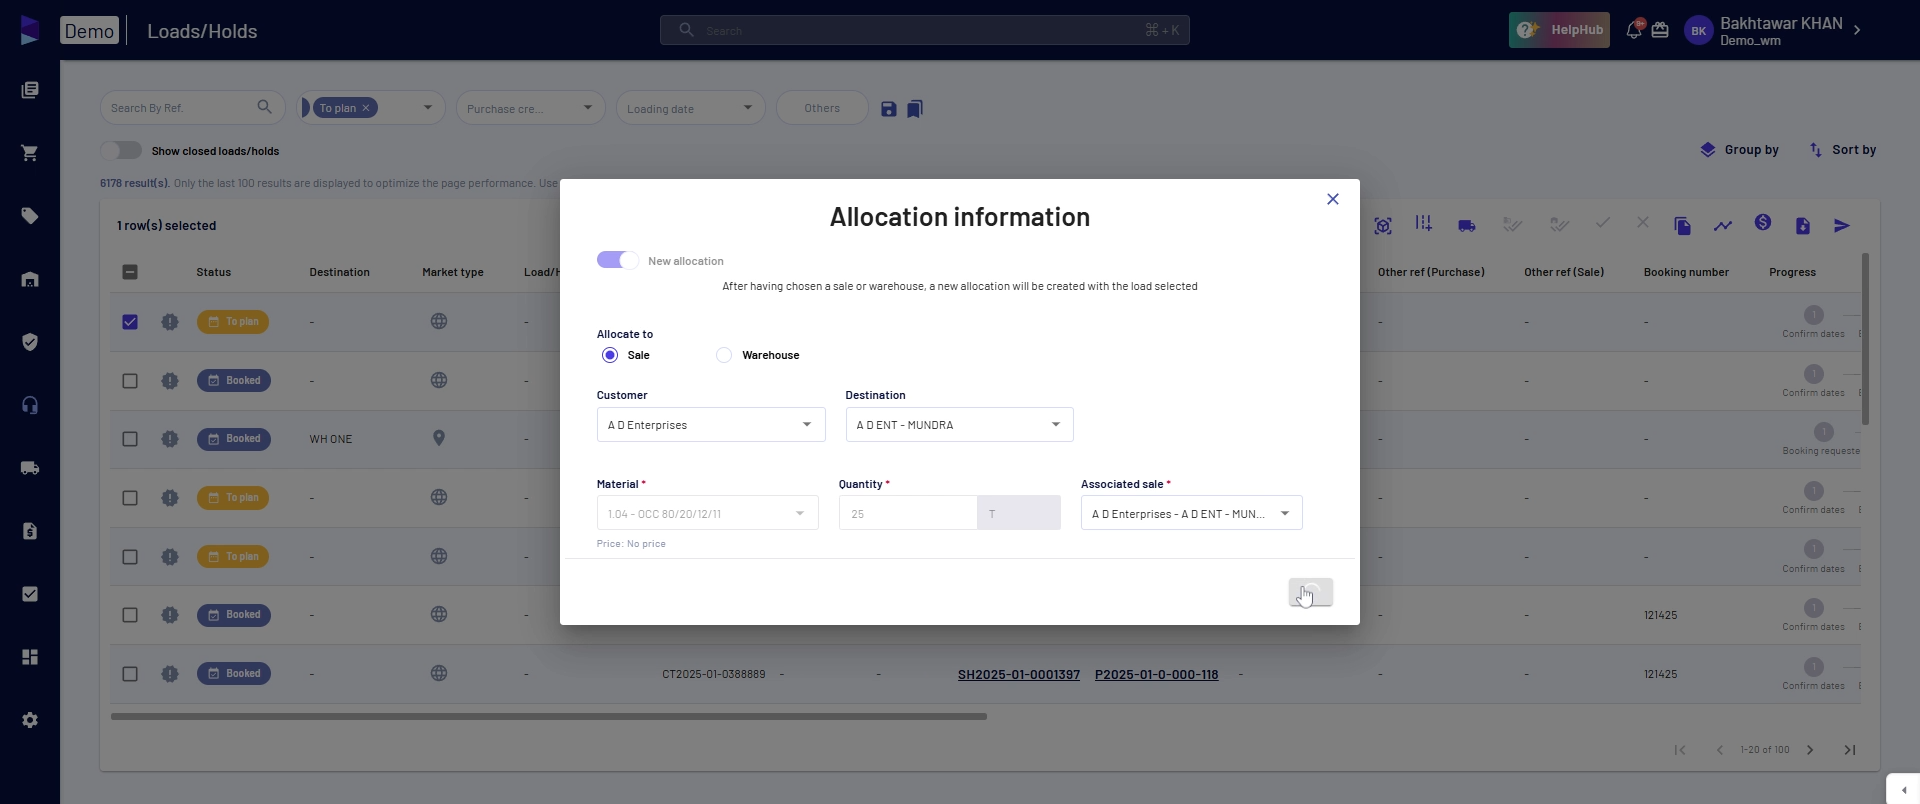
Step 11: The material and quantity fields are already populated. Click on Associated Sale.
Step 12: You'll see a list of all the sales currently available for the selected customer, along with the quantity available. Select a sale.
Step 13: Click on Save.
You'll see that the load has been successfully allocated. This concludes our tutorial on how to allocate a load from the Loads page towards a sale.
Updated on: 23/01/2025
Thank you!